Requirements
- JDK 11.x
- ECLIPSE JAVA EE IDE (2020-12)
- MAVEN 3.6+
- TOMCAT 9.x
We need eclipse which supports JDK 11 and for Enterprise Java developers as it already comes with apache tomcat 9.x adapter and we do not need to install the related plugins.
Setting up the demo platform
Configure eclipse to use JDK 11, Maven 3.6 + and Tomcat 9.x
- To configure Java, go to Windows > Preferences > Java > Installed JREs and validate JDK 11.x is selected. If you do not see JDK 11 please add and select from installed location.
- To configure maven, go to Windows > Preferences > Maven > Installations and validate Maven 3.6 + is selected. If you do not see Maven, please add, and select from installed location.
- To configure Tomcat, go to Windows > Preferences > Server > Run Time Environments and validate we have Tomcat 9.x added. If not please add, and select from installed location.
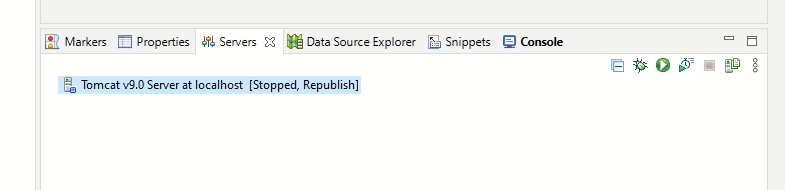
Create a new server to run the application.
In server tab check if server is linked or not. I now click and in next screen select Tomcat v9.0 Server and select the tomcat runtime environment added in previous step.
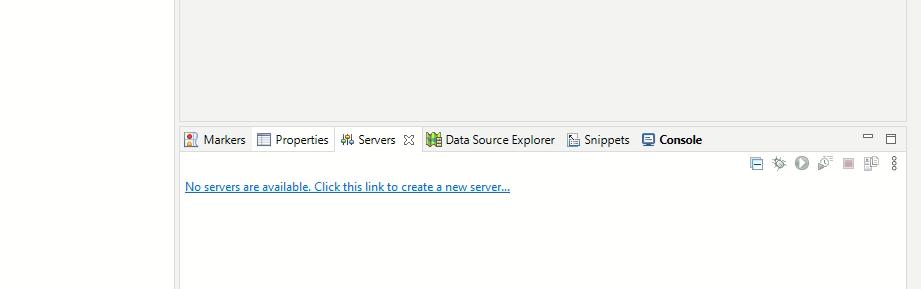
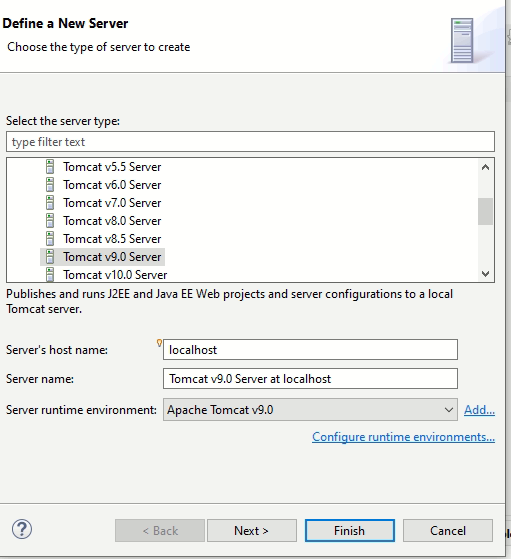
On clicking Finish you can see the server in Servers Tab
By default, server is running on port 8080. In case you want to run on any other report double click the server shown in Servers tab and configure port as shown in below screen
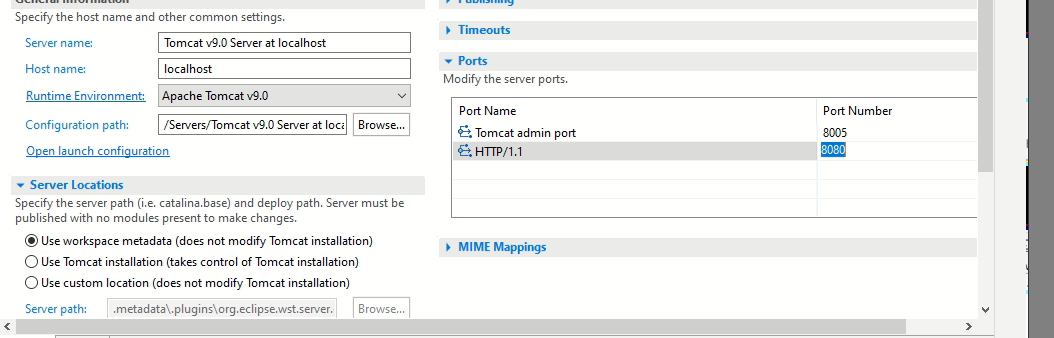
Change the port and save the config using Ctrl-s
Importing project
- Download this file: java_example.zip
- Extract the files.
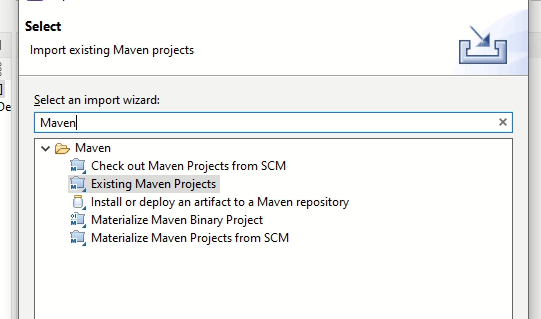
- In Eclipse select File > Import. Then search “Existing Maven Projects”.
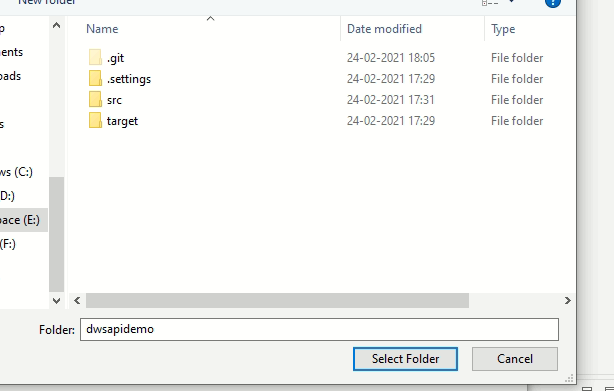
- Click Next and browse to folder extracted in above step, Select Folder and click Finish.
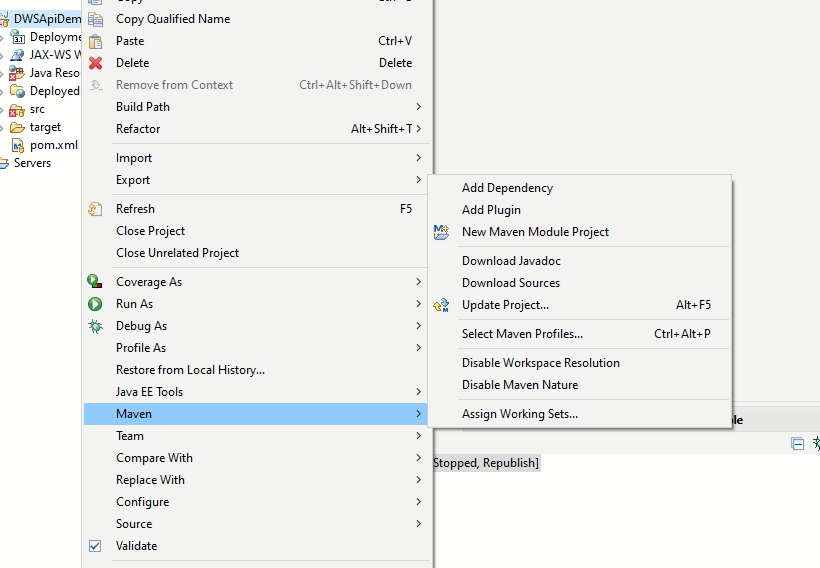
- After above step wait for eclipse to import project. Eclipse will download all required dependencies from maven. Though eclipse will automatically download all dependencies still just to make sure right click project and select Maven > Update Project
Run project
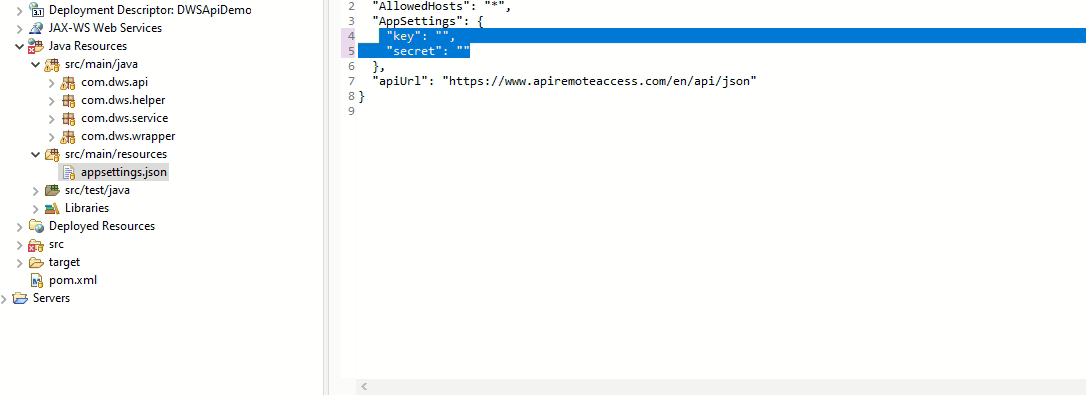
- Enter your key and secret in the file appsettings.json as shown in the figure:
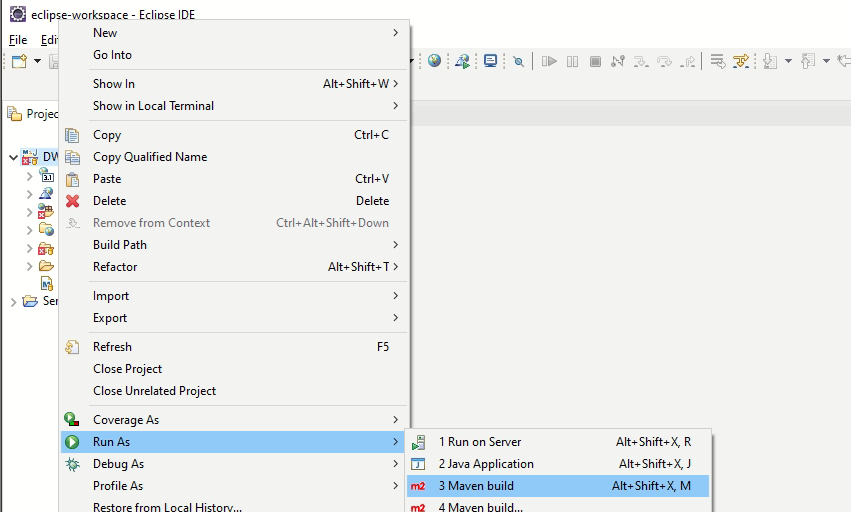
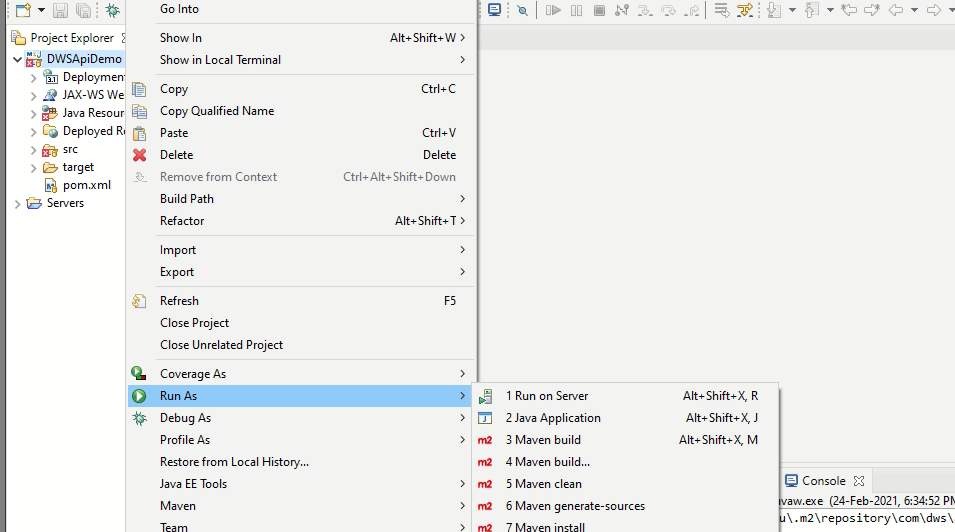
- Compile project using maven. Right click project Run As > Maven Build:
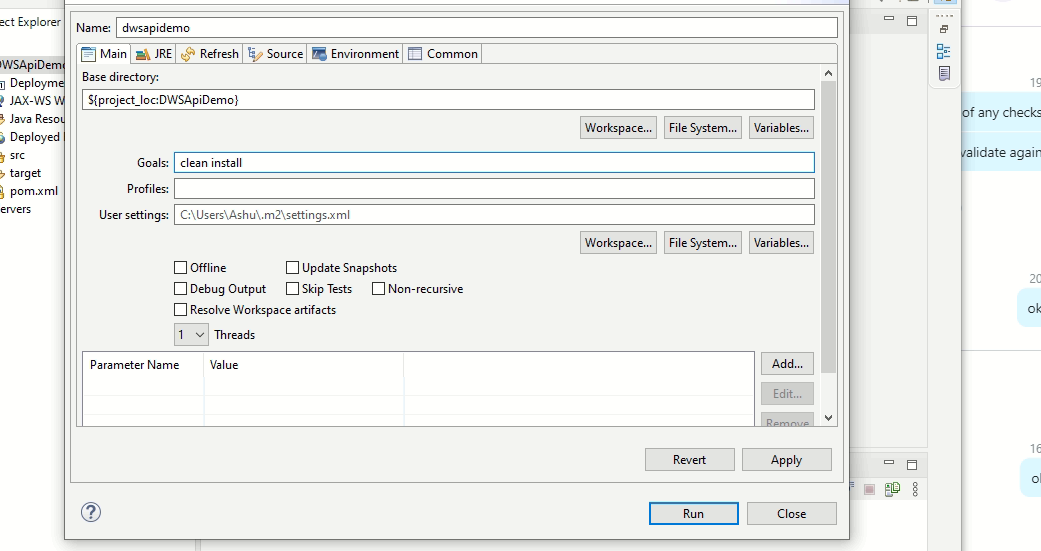
- In goals add “clean install” and click Run:
- After successful build right click project and Run As > Run On Server OR Run Ad > Debug On Server
- In next screen select the server defined earlier and click finish. Once server is started you can access the portal:
http://localhost:8080/DWSApiDemo/
Port may be different as configured in server config.
Discovering the demo platform
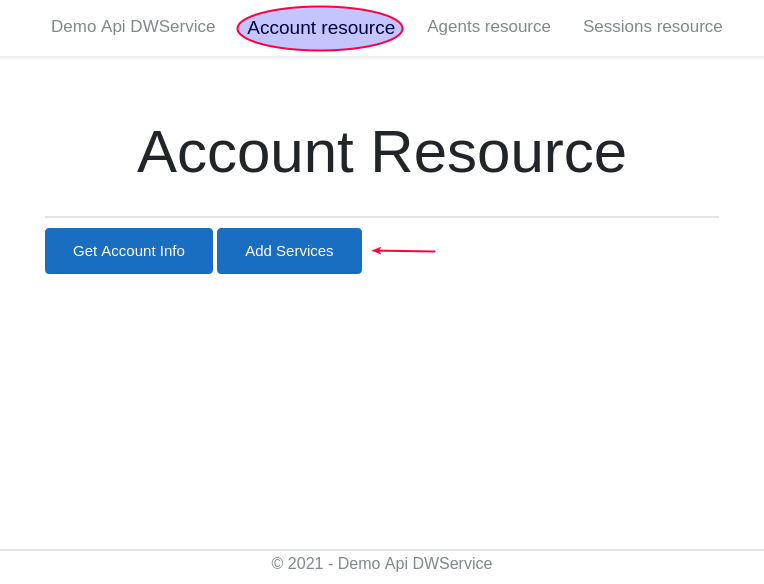
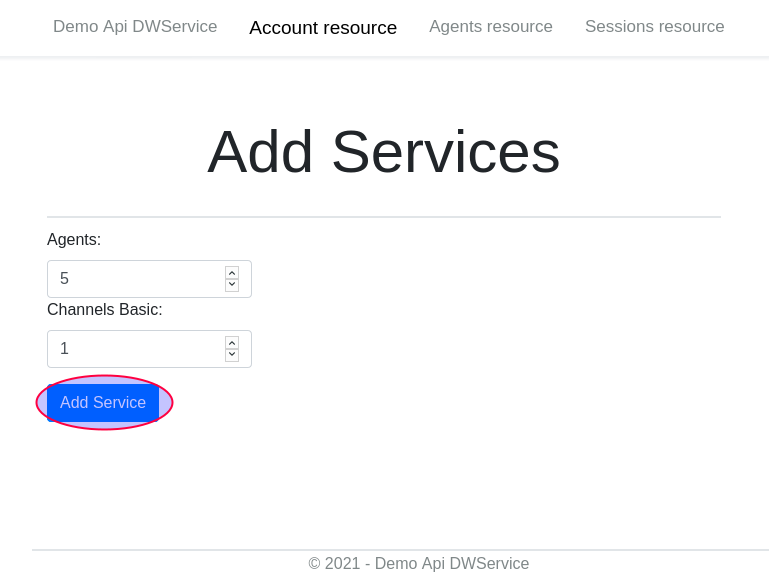
Add services
Click the menu button Account Resource, click the Add Services button in the opened page, add 5 agents and 1 channel:
Create An Agent
Click the menu button Agents Resource, click the Create button in the opened page. Enter a name and a description for the agent.
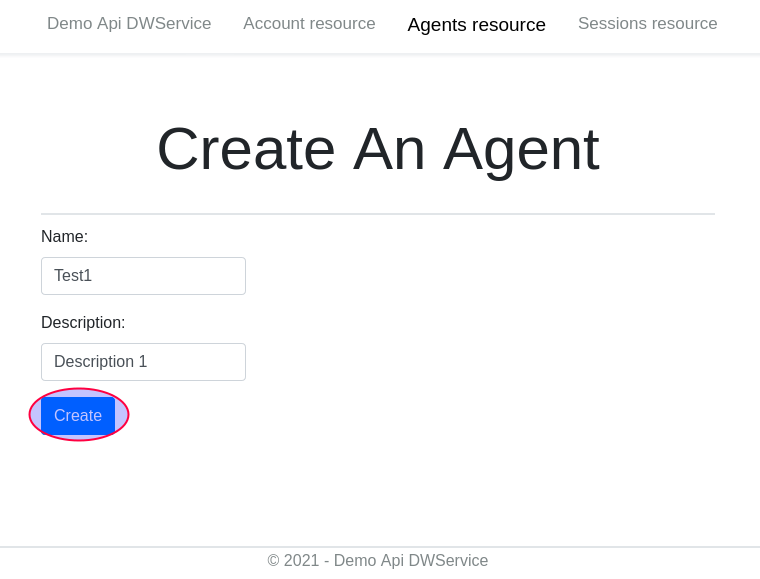
The response is the id associated with the agent.
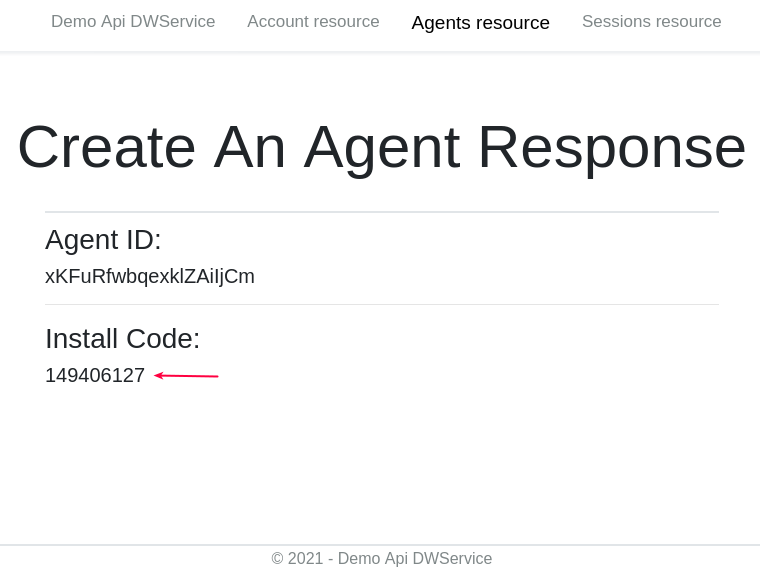
Install Code is the code to enter when you install the agent on the PC you want to control.
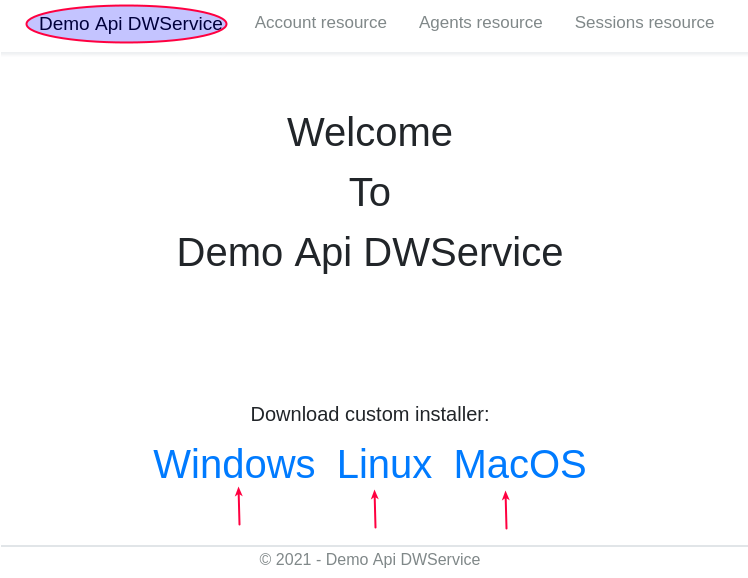
Download and install the custom installer for your OS from project home page:
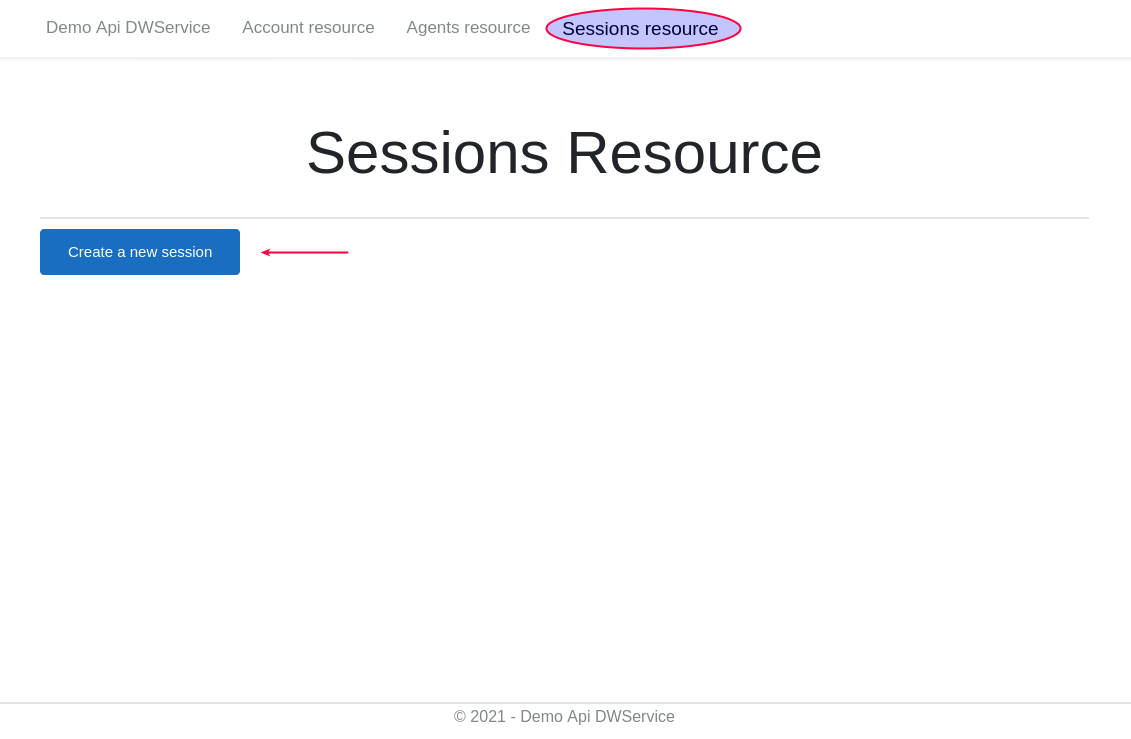
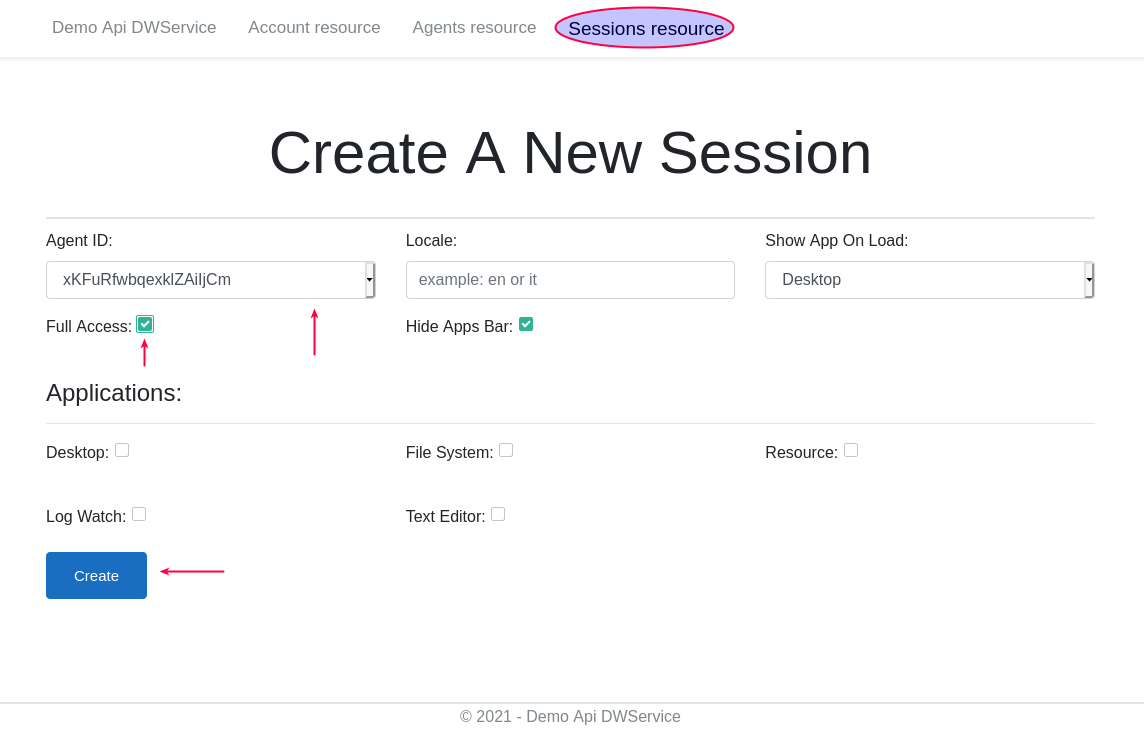
Create a new session
Click the menu button Sessions Resource, click the Create a new session button in the opened page.
To create a new session you have to:
- Enter the Id of the Agent you want to connect
- Enter the language, for example en (by default is en)
- Choose the app shown when the session opens
- Choose if you want to see menu apps
- Choose if you want all the applications by selecting Full Access or select them individually