
In case you choose this installation method, you should follow our next guide, step-by-step.
1. Visit our website: https://www.dwservice.net
2. Login to your account. You can read more about the login process here: Login
3. You will see your dashboard:
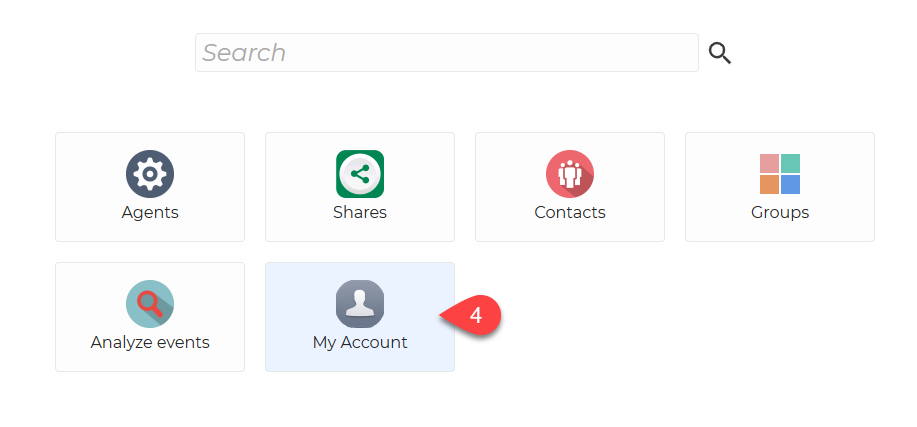
4. On your Dashboard, select My Account.
After selecting My Account, this will be displayed:
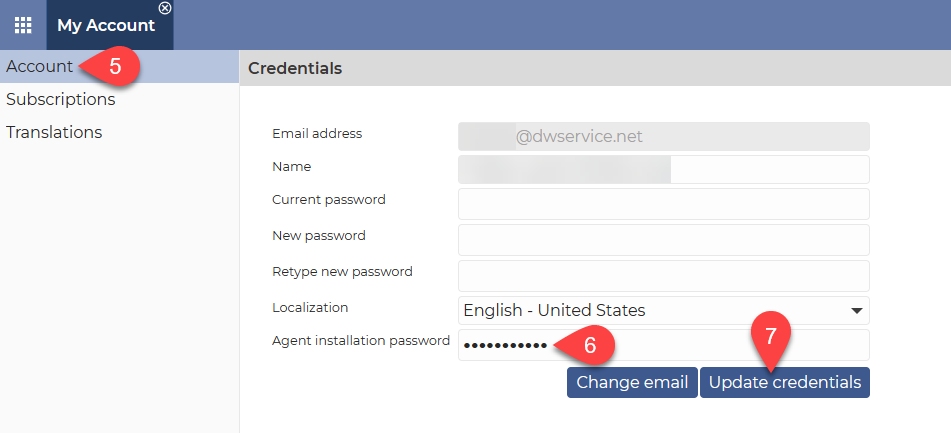
5. From the menu on the left, select Account.
6. Enter the Agent installation password, which you will be asked to enter when you install the Agent.
⚠️ Important: For security reasons, this password cannot be the same as your account password. Choose a different password.
7. To save the password, click the Update credentials button.
The following window will appear:
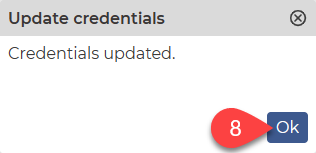
8. Click on the Ok button.
Now let’s see how to install the Agent.
In case you use a Linux with Desktop Environment, Start the Terminal application:
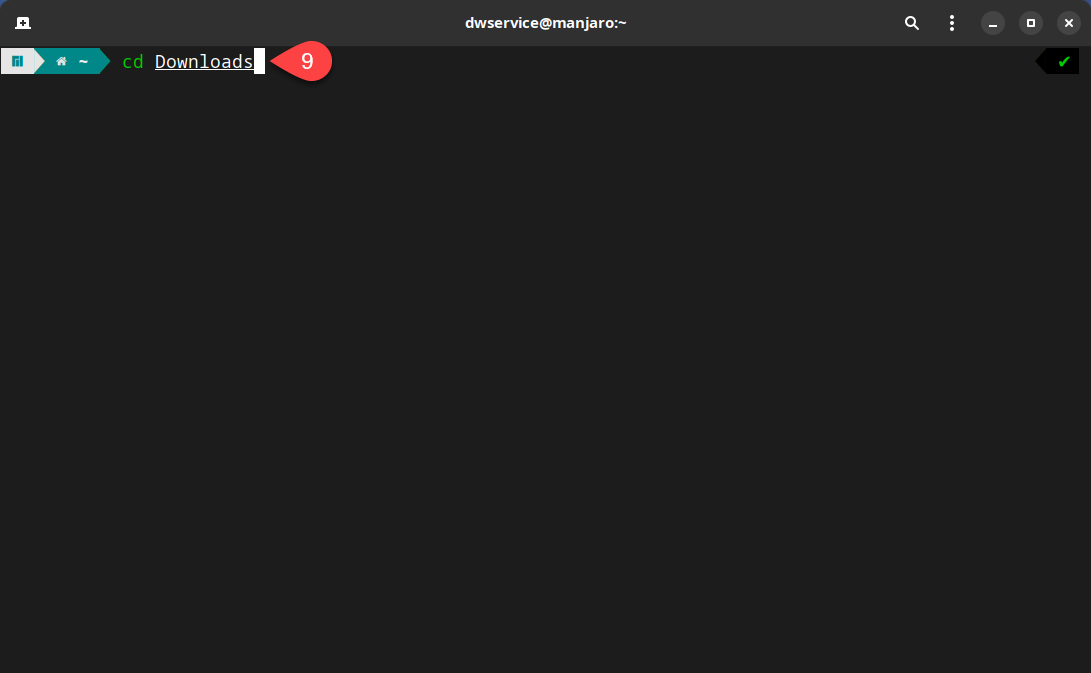
9. Open the folder where you want to install the Agent. For example, the Downloads folder.
⚠️ Note: Folders are case sensitive.
Now, let’s download the Agent:
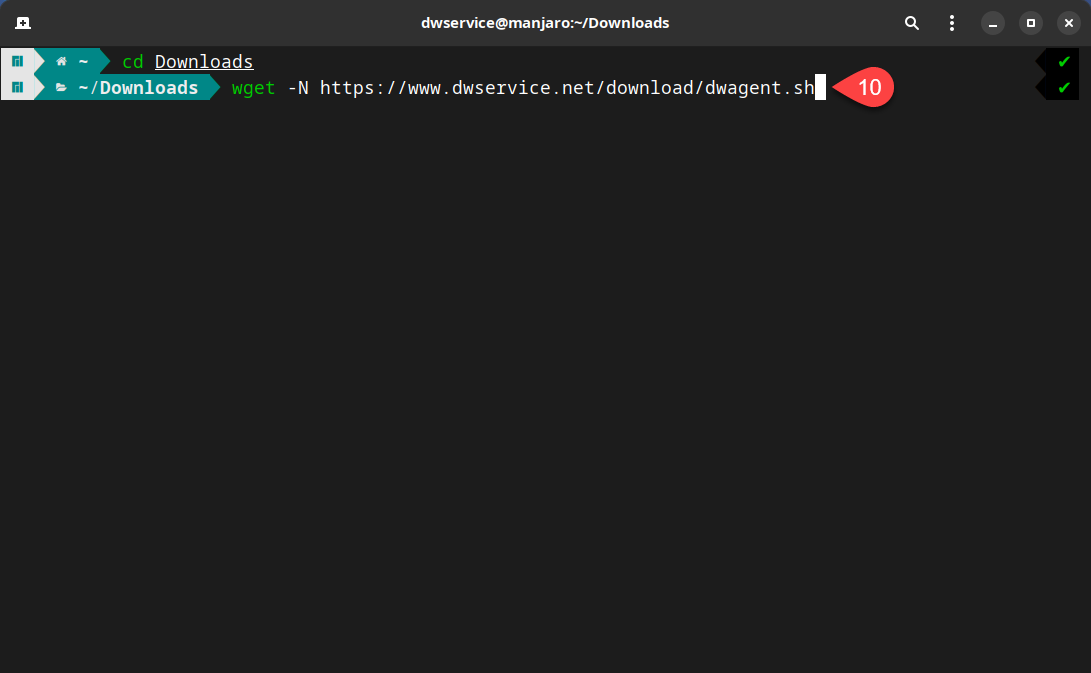
10. You can use the wget command to download the Agent: wget -N https://www.dwservice.net/download/dwagent.sh
❗ Using -N, if the folder already contains a dwagent.sh file, it will be overwritten.
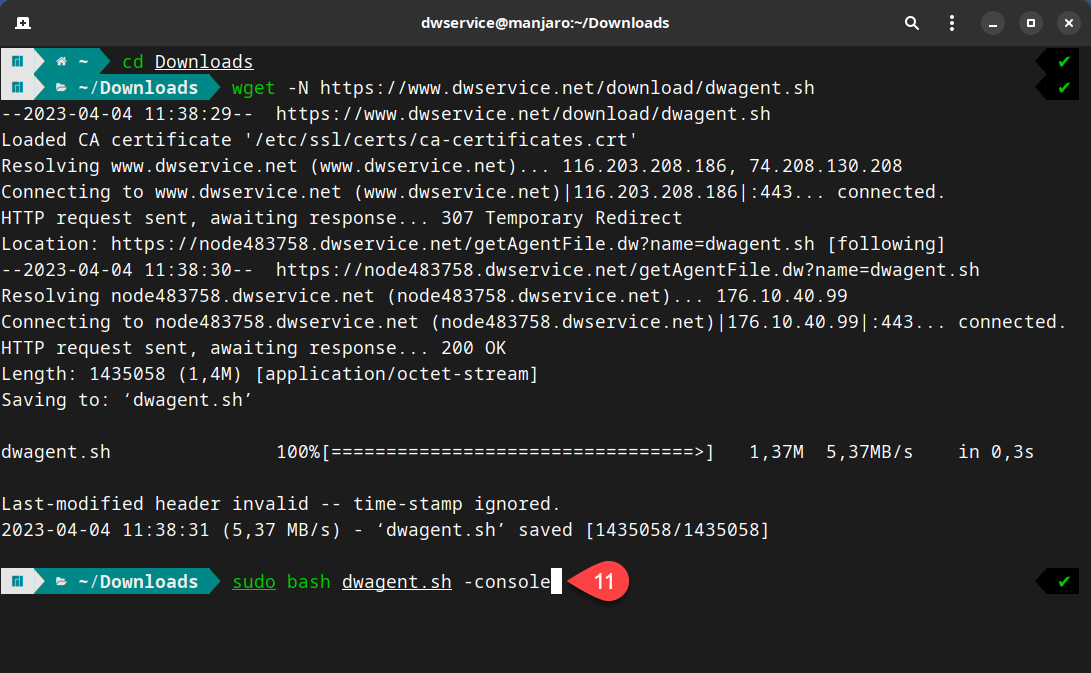
11. If you are using Linux that does not include a Desktop Environment, type sudo bash dwagent.sh and hit Enter.
If you are using Linux that does include a Desktop Environment, type sudo bash dwagent.sh -console and hit Enter.
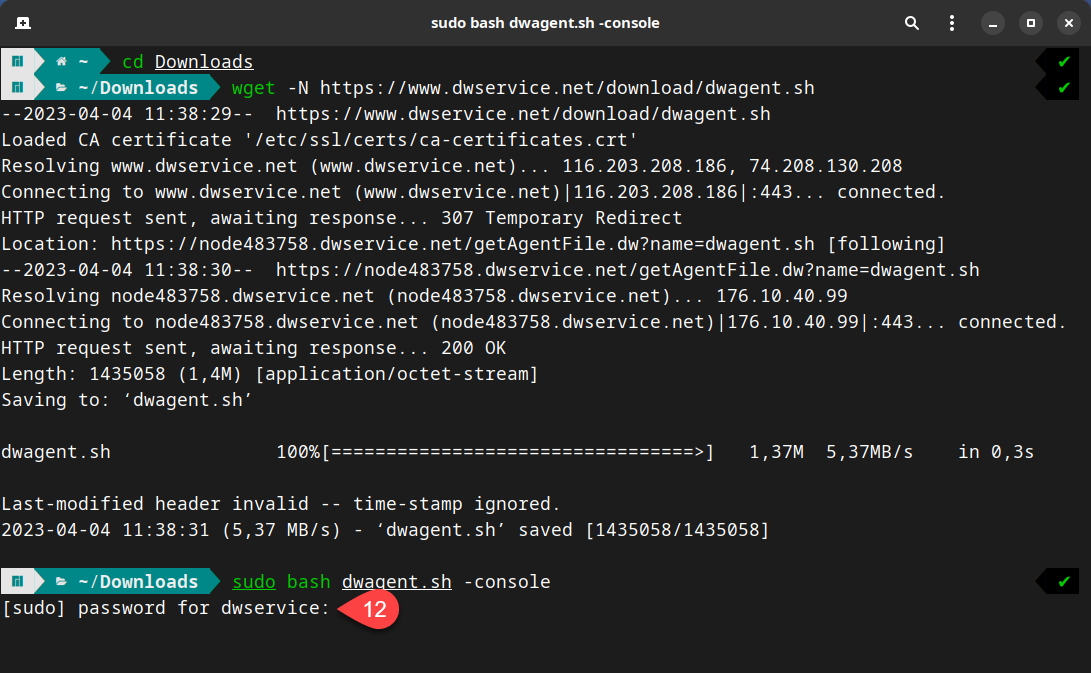
12. Enter the password for the Linux user.
⚠️ Note: The system does not display the way you type the characters. But just type the password. Then press Enter.
A wizard will be launched to guide you through the installation process.
❗ In the wizard, you can step back one step by typing #BACK at the prompt and then pressing Enter. To exit the wizard, type #EXIT at the prompt and press Enter.
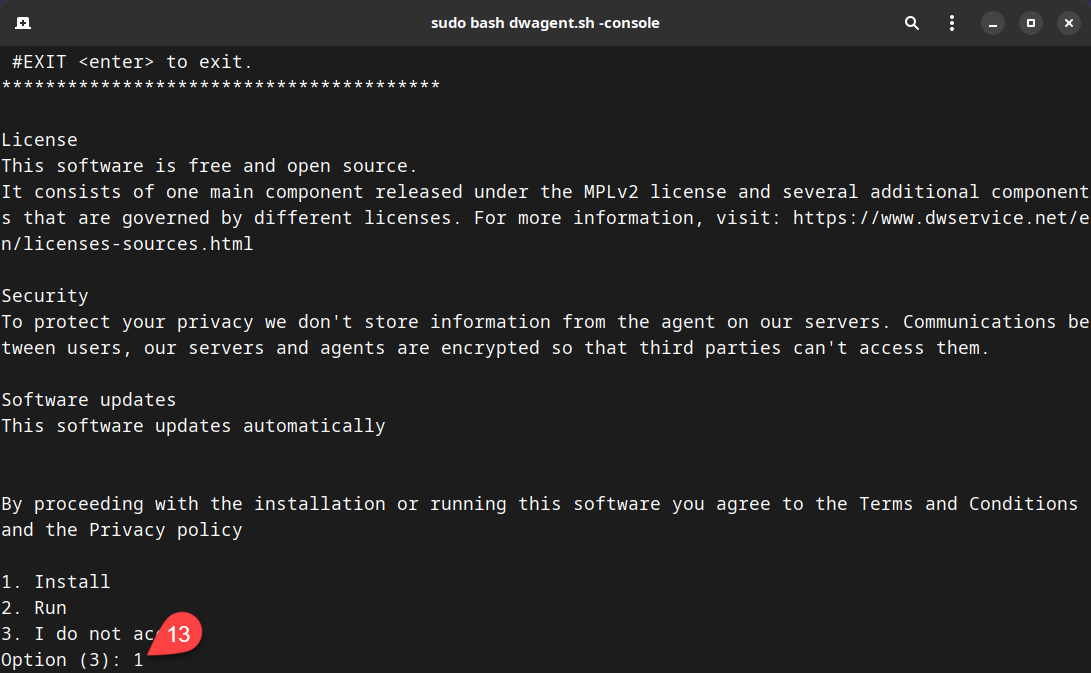 13. From the options, select the option Install, which is option 1. Then press Enter.
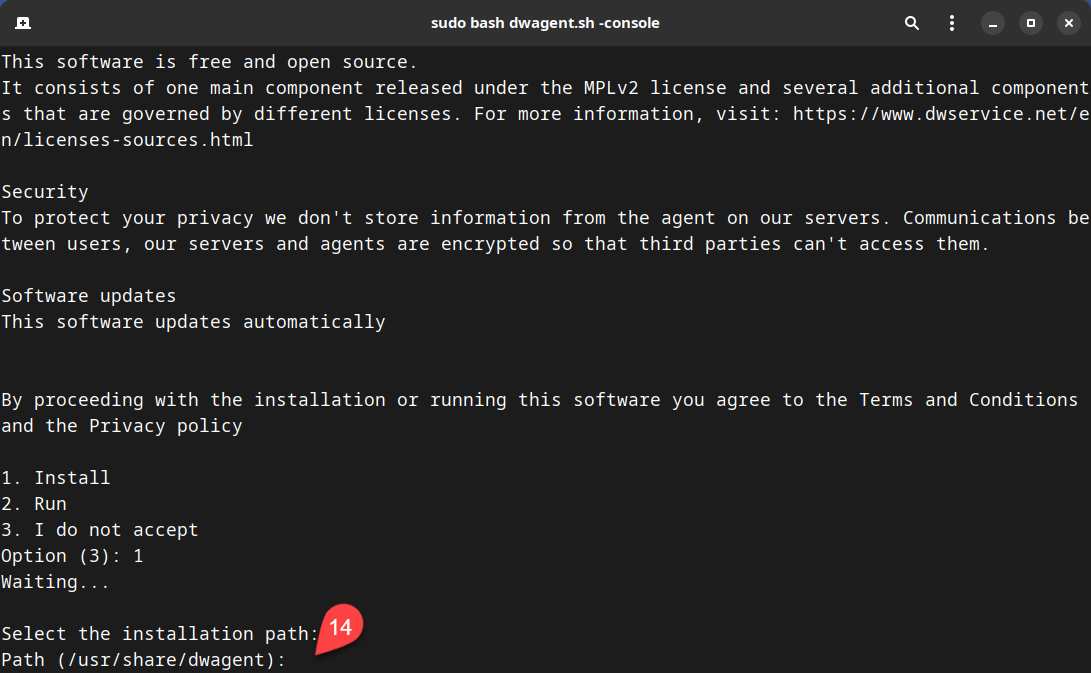
14. Here you can change the path where the Agent will be installed.
The default path is: /usr/share/dwagent
If you want to install the Agent in the default folder, just hit Enter.
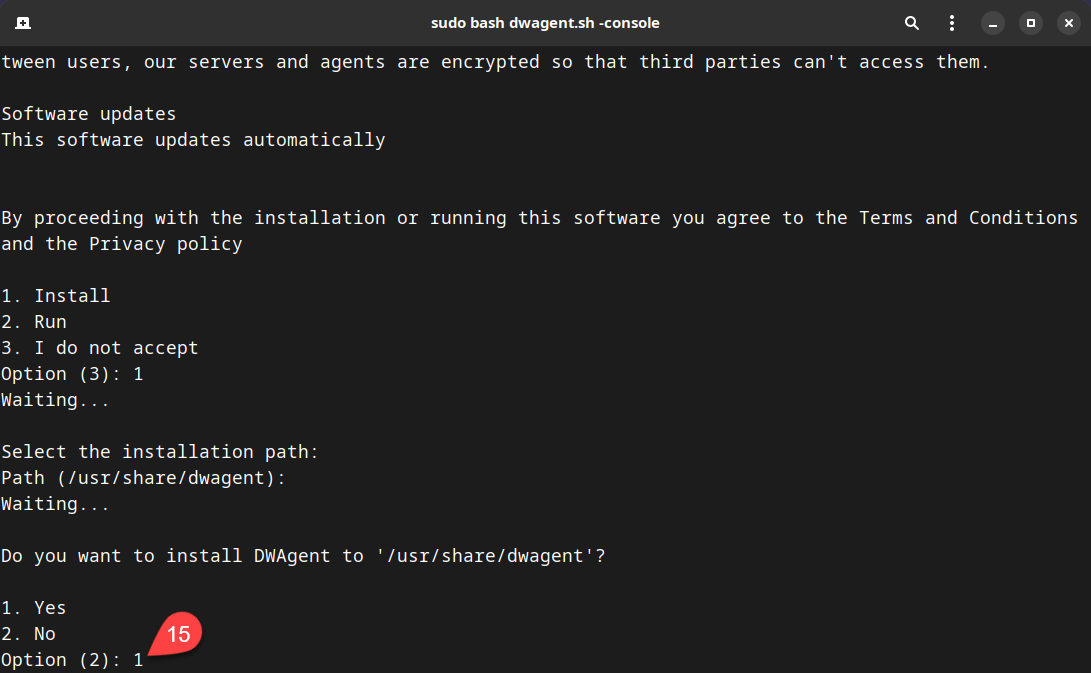
15. To confirm the installation path, from the options, select Yes, which is option 1. Then press Enter.
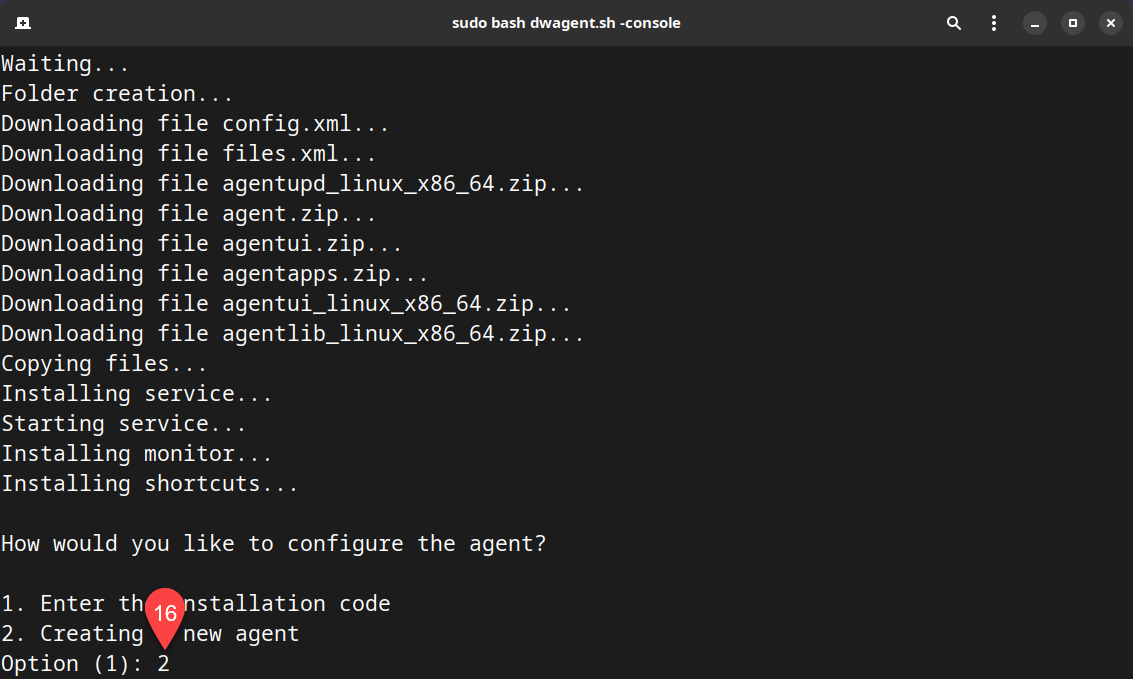
16. From the two installation options, select the option Creating a new agent, which is option 2. Then hit Enter.
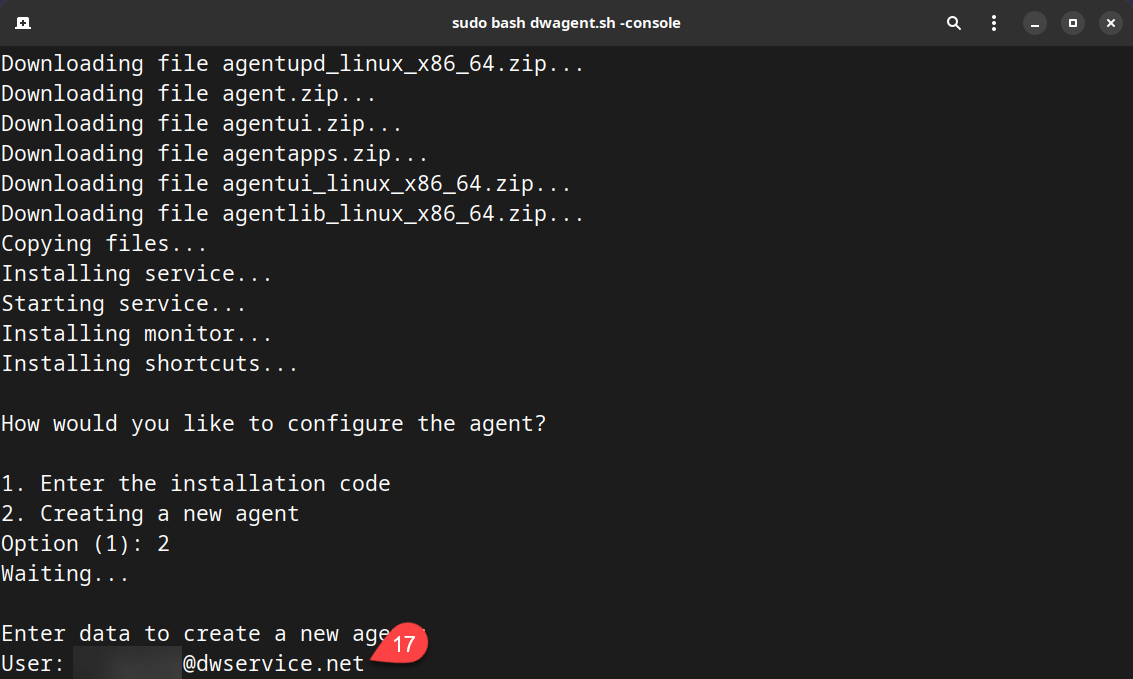
17. Enter your username (email address) associated with your DWService account. Then press Enter.
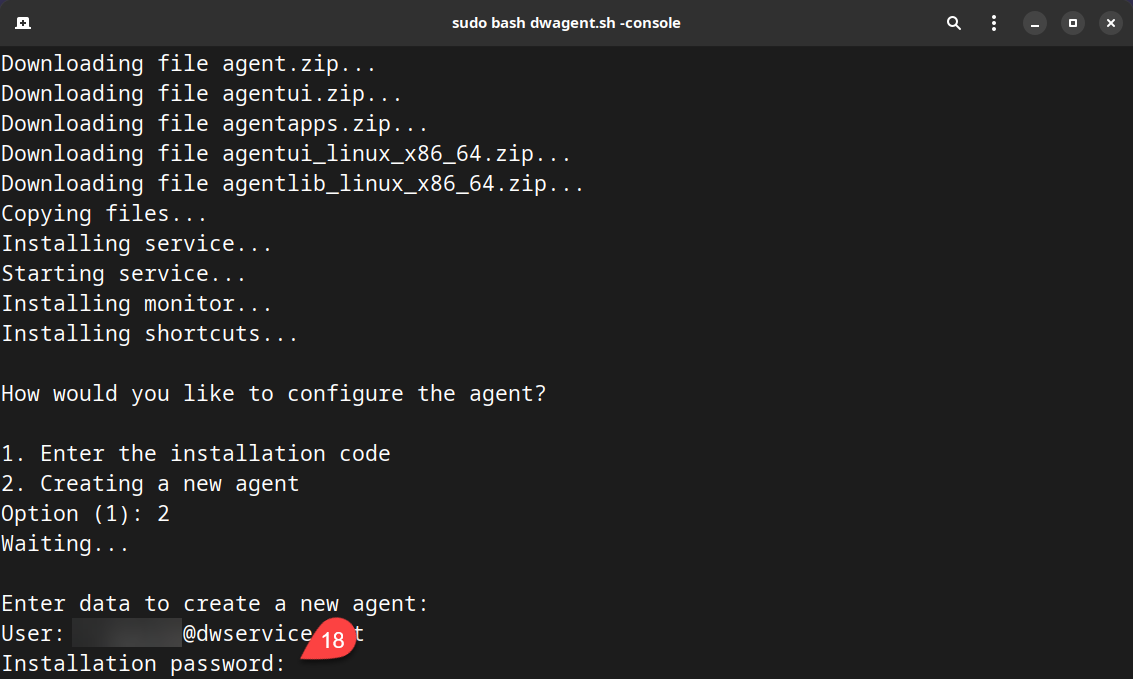
18. Type the Agent installation password. Then press Enter.
⚠️ Note: This is not your account password, but a password created specifically for this purpose in your account (Dashboard –> My Account –> Credentials –>Agent installation password).
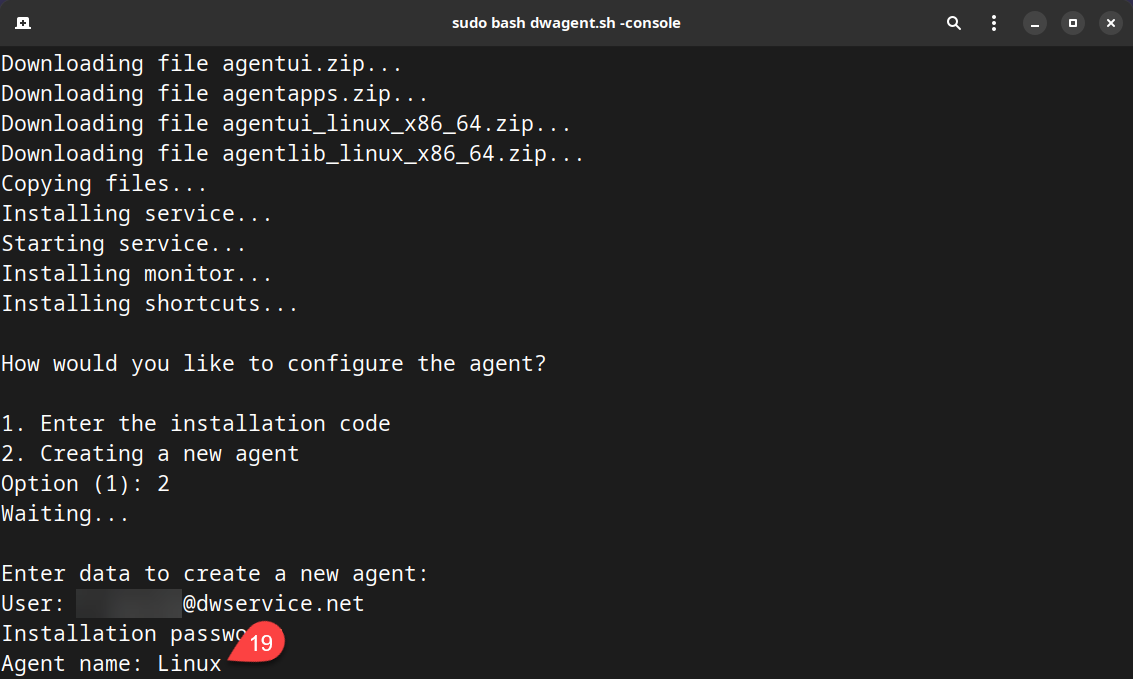
19. Enter a name for the Agent. Then press Enter.
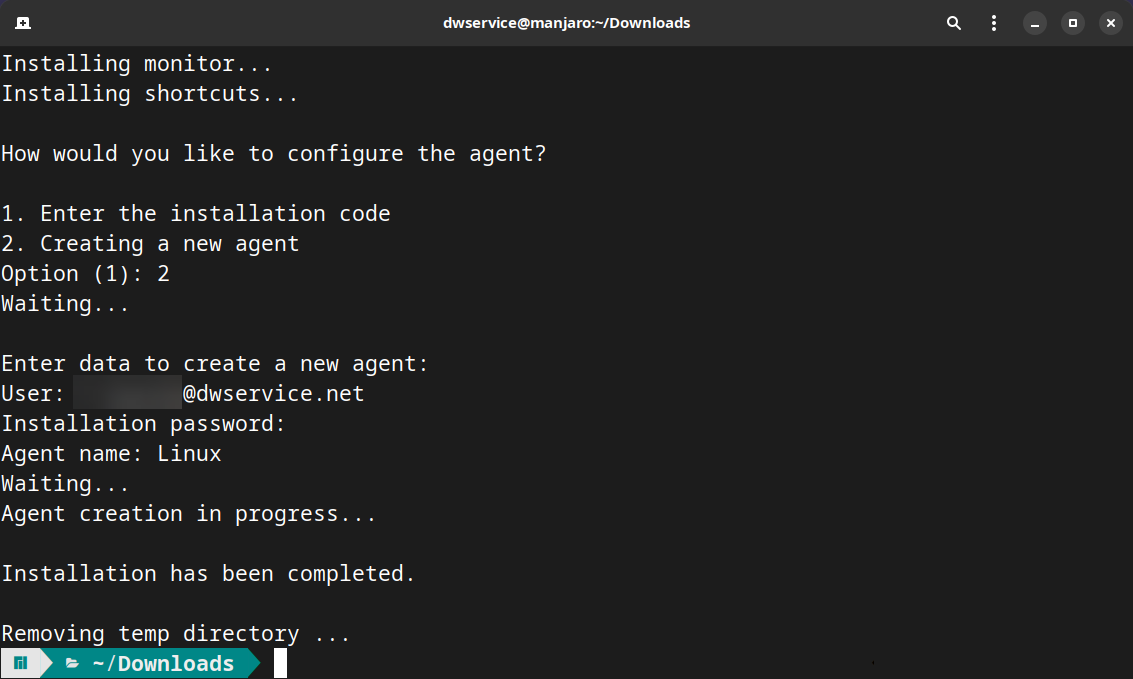
As you can see in the picture above, the installation has been successfully completed. The Agent is ready to use.
Switch back to the account.
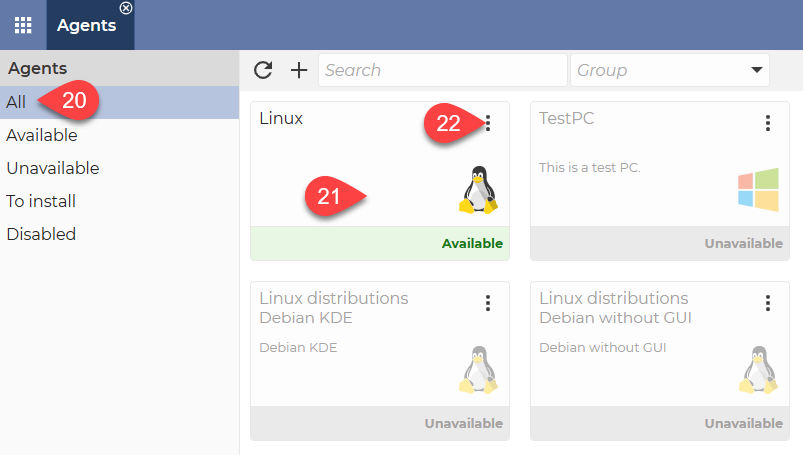
20. In the menu on the left, select All.
21. The Agent is available. You can connect to the agent by clicking on it.
➕ Additional configuration option (optional):
As you can see, the agent created is not in a group, nor does it have a description. If you don’t need these, we are now at the end of the process. The Agent is ready for use.
If you would like to put the Agent in the group and/or add a description to it, please do the next few steps:
22. Click on the three dots in the top right corner of the Agent. This will open the menu for the Agent.
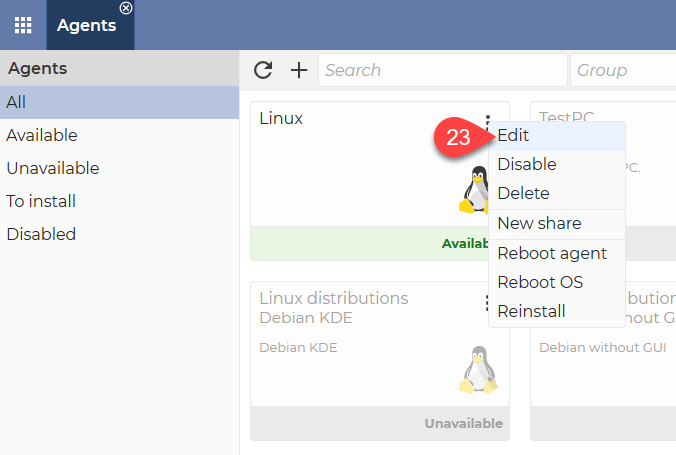
23. From the menu that appears, select Edit.
You see the Edit window of the Agent:
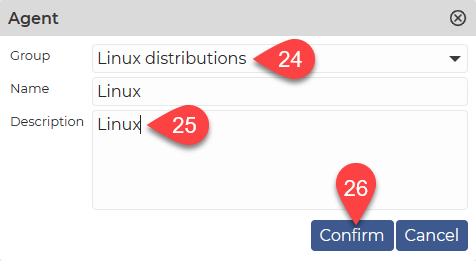
24. The selection of Group is optional. If you do not wish to add the agent to a group, simply leave this field blank. If you want to add the Agent to a group, select the desired group from the drop-down menu. If there is no Group in the drop-down menu that suits you, you can create a new Group by selecting Groups in the Dashboard. For more details, click here.
25. Optionally, you can provide a Description of the Agent, which will help you to identify the Agent later.
26. To save the changes, click on the Confirm button.
After the window closes, you will see this:
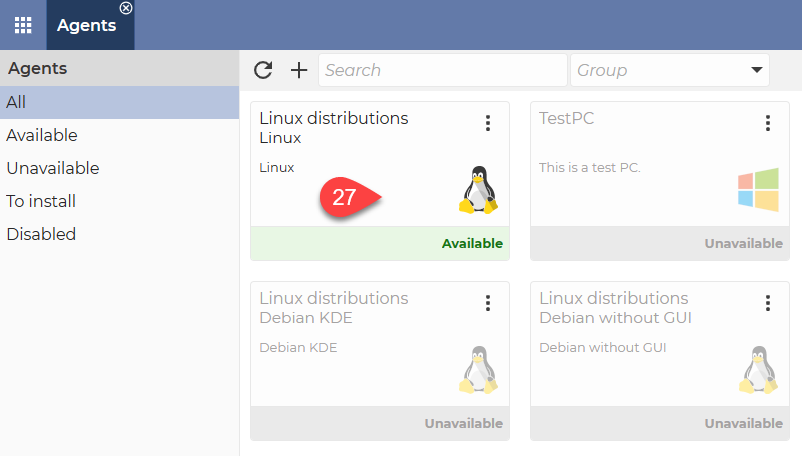
The Agent is available and ready to use.
To connect to the Agent, click on the Agent.
This brings us successfully to the end of the installation process.
Use it with maximum satisfaction.