In case you choose this installation method, you should follow our next guide, step by step.
Visit our website: https://www.dwservice.net
On the main page you will see the login form:
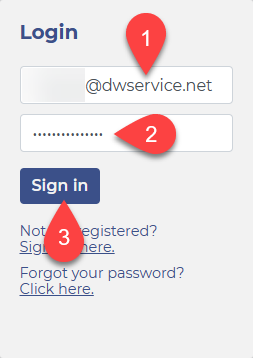
1. Enter your username (Your email address).
2. Enter your password.
3. Click the Sign in button.
You will see the Dashboard:
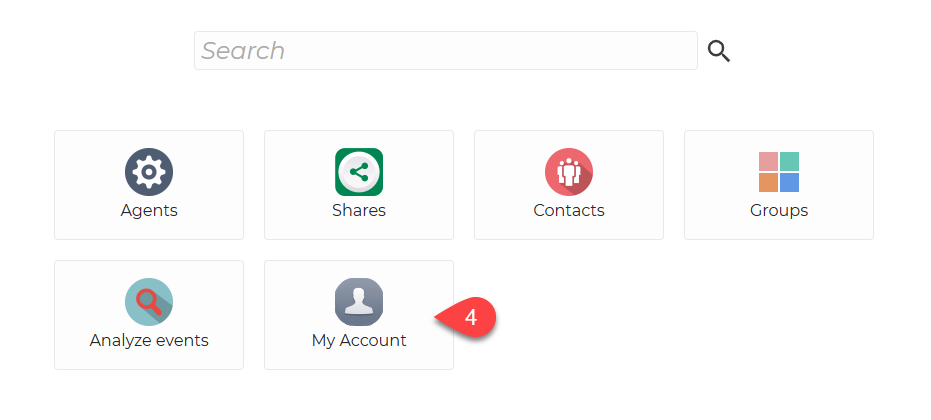
4. On your Dashboard, select My Account.
After selecting My Account, this will be displayed:
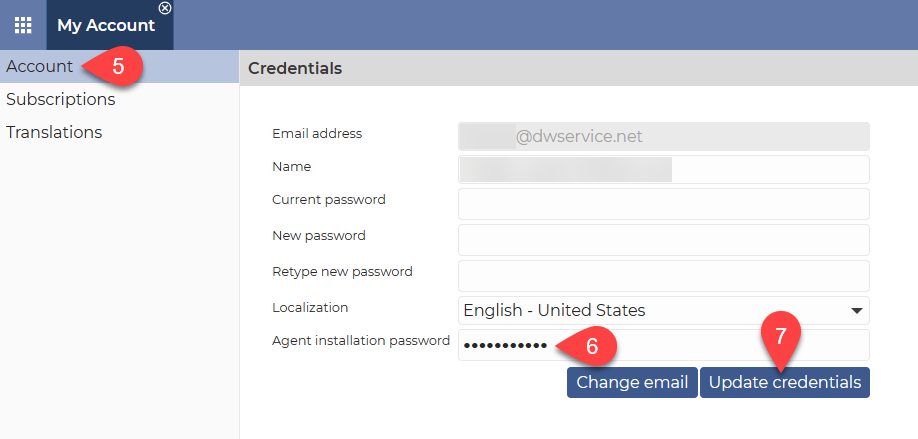
5. From the menu on the left, select Account.
6. Enter the Agent installation password, which you will be asked to enter when you install the Agent. ⚠️ Important: For security reasons, this password cannot be the same as your account password. Choose a different password.
7. To save the password, click the Update Credentials
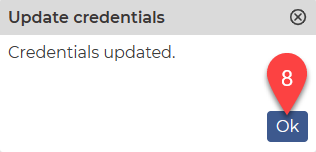
The following window will appear:
Now let’s see how to install the Agent.
Download the Agent installer for your device from our download page (https://www.dwservice.net/download.html).
After downloading the file, open it to start the installation process.
A wizard will be launched to guide you through the installation.
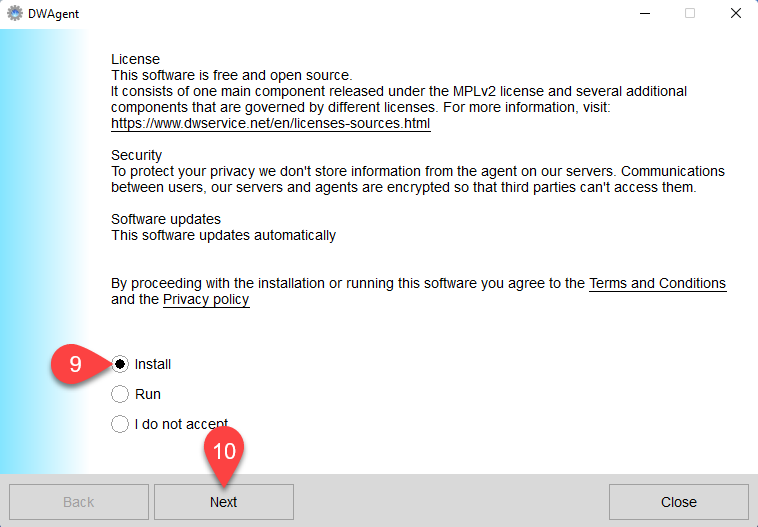
9. From the options select the Install option.
10. Click on the Next button.
A confirmation window will appear:
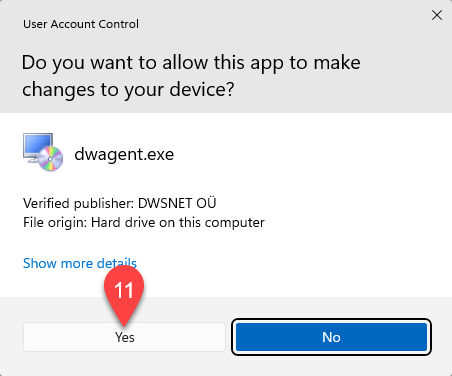
11. This must be approved before the installer can make changes to the device. To continue the installation, you must allow it, which is done by clicking the Yes button.
Then the wizard appears again:
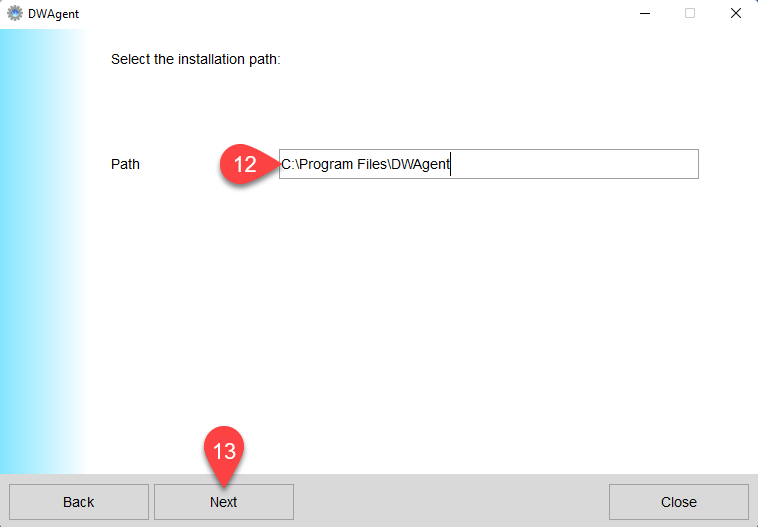
12. Here you can see the location where the Agent will be installed. This is the default path. If you want to install the Agent somewhere else, you can change the path here.
13. Click on the Next button.
The next page of the wizard is displayed:
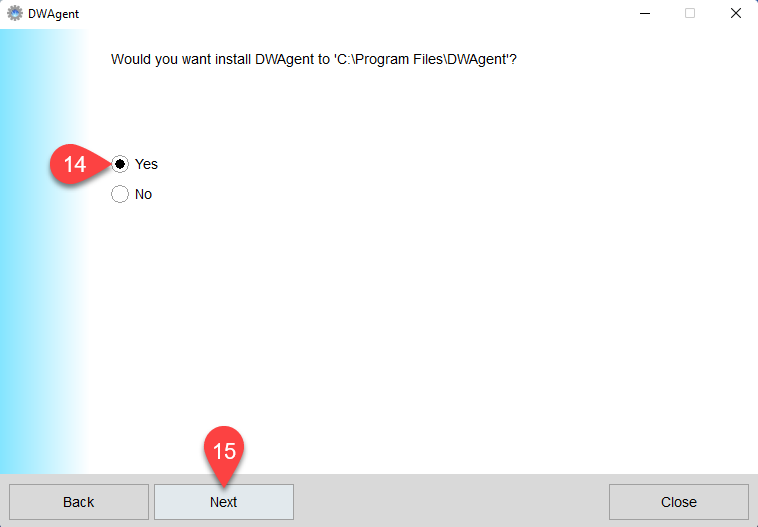
14. Select Yes to confirm that the specified installation path is correct.
15. Click on the Next button.
The next page of the wizard is displayed:
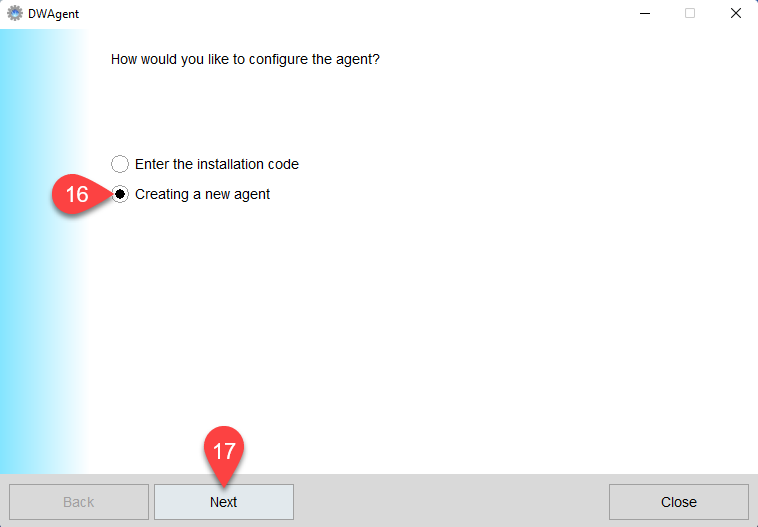
16. From the two installation modes, select the ‘Creating a new agent‘ option.
17. Click on the Next button.
The next page of the wizard is displayed:
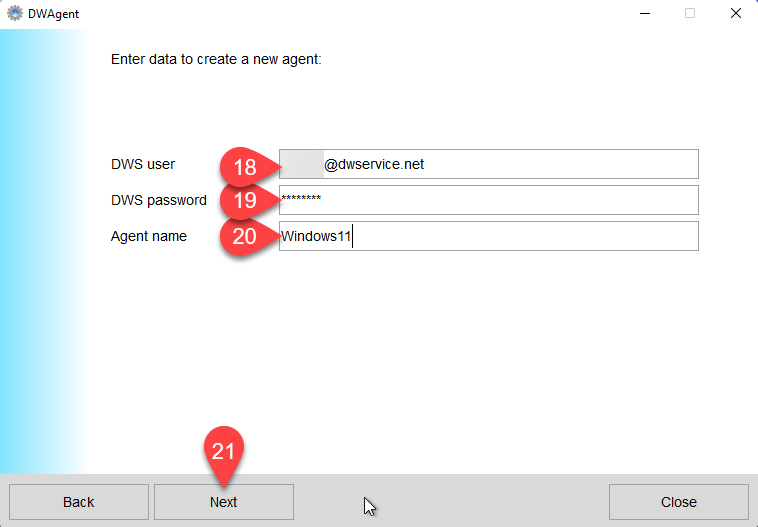
18. Enter your DWService account username (Your email address)
19. Enter the Agent installation password. You have previously set this up in your account in the Credentials section. ⚠️Important: this is not your account password.
20. Enter a Name for the Agent you want to create.
21. Click on the Next button.
The next page of the wizard is displayed:
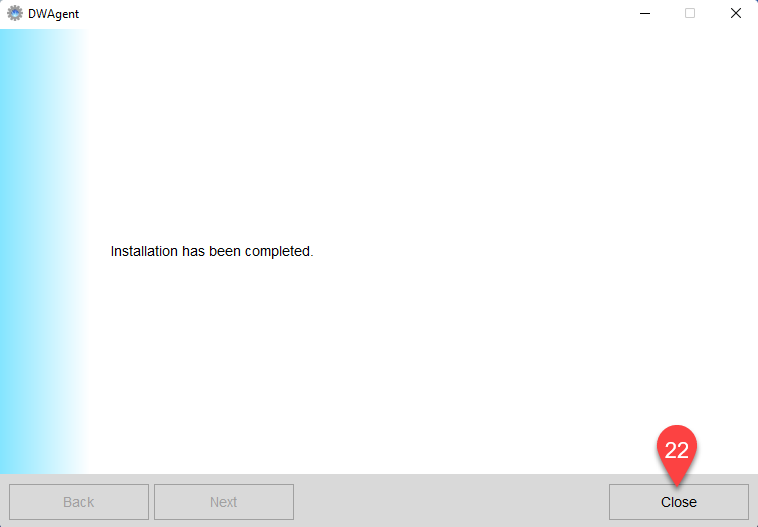
As you can see, the Agent has been successfully installed.
22. Click on the Close button to close the wizard.
After installation, the Monitor icon appears in the taskbar.
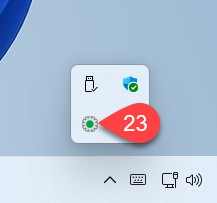
23. Click on the Monitor icon to show the DWAgent – Monitor window.
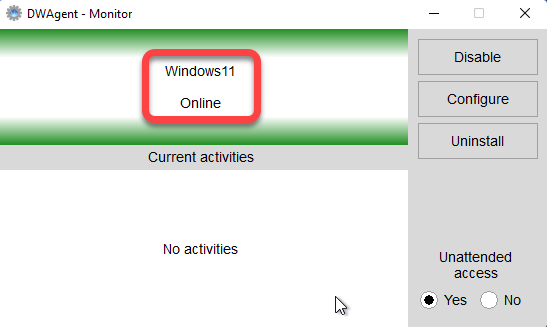
In the image above you can see that the Agent is active and Online. From now on it is possible to connect to this Agent.
Now let’s go back to the account where you can see the Agent you created:
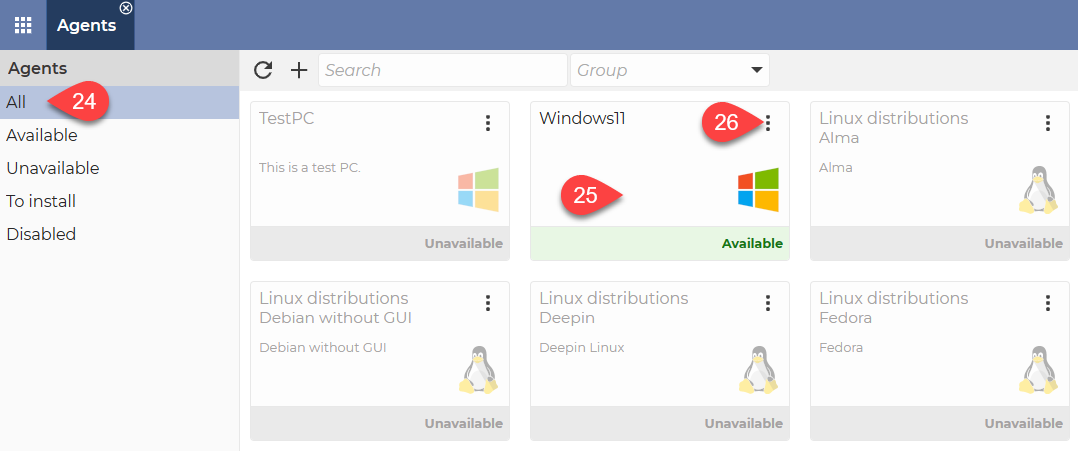
24. In the menu on the left, select All.
25. The Agent is available. You can connect to the agent by clicking on it.
As you can see, the agent created is not in a group, nor does it have a description.
If you don’t need these, we are now at the end of the process. The Agent is ready for use.
If you would like to put the Agent in the group and/or add a description to it, please do the next few steps:
26. Click on the three dots in the top right corner of the Agent.
This will open the menu for the Agent:
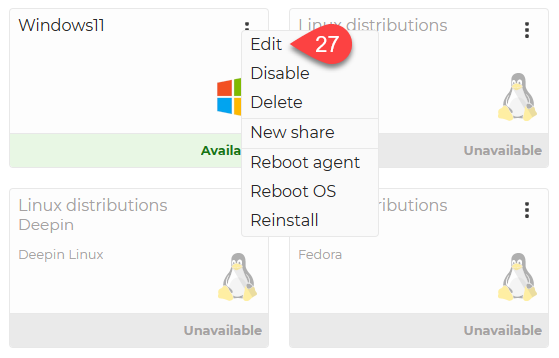
27. From the menu that appears, select Edit.
You see the Edit window of the Agent:
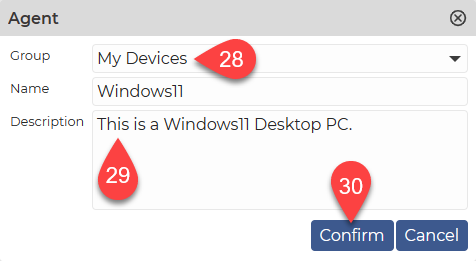
28. The selection of Group is optional. If you do not wish to add the agent to a group, simply leave this field blank. If you want to add the Agent to a group, select the desired group from the drop-down menu. If there is no Group in the drop-down menu that suits you, you can create a new Group by selecting Groups in the Dashboard. For more details, click here.
29. Optionally, you can provide a Description of the Agent, which will help you to identify the Agent later.
30. To save the changes, click on the Confirm button.
After the window closes, you will see this:
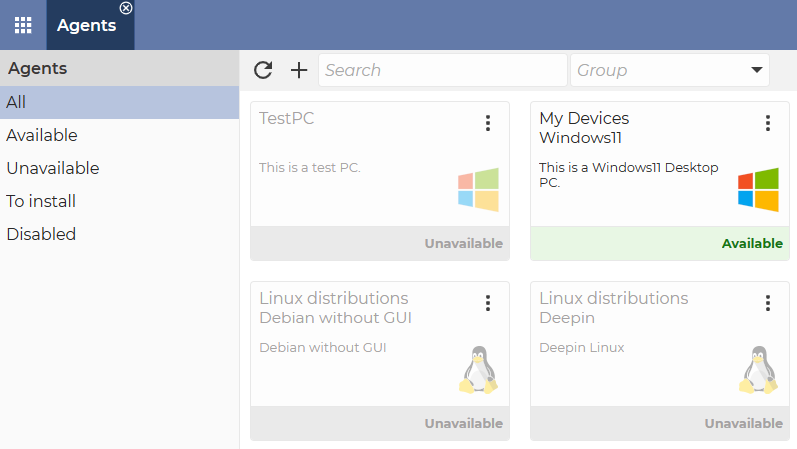
The Agent is available and ready to use.
This brings us successfully to the end of the installation process.
Use it with maximum satisfaction.
If you would like to watch the process on video, we invite you to watch our tutorial video on How to install Agent with Credentials:
